My embroidery thread is a hot mess and I spend more time searching through the pile of thread as opposed to actual sewing.
Here's how you corral your floss in a nice, neat organized stash.
Head on over to Joann Fabrics and don't forget your coupon!
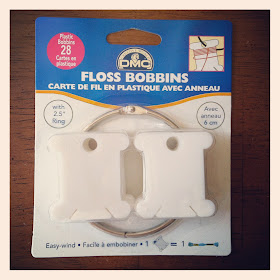
Purchase the following products:
*note that I used DMC brand*
 |
| Floss bobbins |
 |
| Floss Number Stickers |
 |
| DMC Floss |
Put your empty bobbins on the ring.
Pull the two wrappers off the floss,
but don't throw them away yet!
Take the end of the floss and thread it through
one of the small slits at the bottom.
I thread it through two or three times wrapping
around the rounded corners
for extra security.
Wrap the entire package of floss
around the mid-section of the bobbin
and pull the end of the thread through
the other slit.
I wrap two or three times here as well.
Remember how I said not to throw the wrappers away?
Find your wrapper and look for the color number
next to the bar code.
(It's usually a three digit number.)
Open your package of floss number stickers and
look for the coordinating sticker.
Place sticker in the top right corner where you find
No.____
I'm just getting started!
I do have floss that isn't DMC brand
and I still put it on the bobbins,
they just aren't organized by number.
Here are the needles I use.
Hand embroidery adds a sweet touch to
almost anything! It's a fun way to personalize
with a child's name or a favorite quote.
Visit DMC for a list of all the colors they make.
You can purchase embroidery designs but personally
I just make up my own and draw it lightly in pencil.
I highly recommend that you watch this video
to learn the basic stitches and to see how some
of the tools are used.
Enjoy


No comments:
Post a Comment
THANK YOU so much for commenting! We LOVE hearing from our readers!