Showing posts with label dropcloth. Show all posts

December 15, 2011

ChalkCloth Christmas Ornaments

Hi there,
I write from the land of the sick and the brave.
We've conquered, we've battled, but we will not be defeated.
Well, at least the kids won't be defeated.
Me?  The Mom?  Well that's a whole nother story.
I'm close to being defeated.  I mean seriously, legally aren't I entitled to a break every four hours?  Or, like, aren't I eligible at this point to collect overtime pay?

Well, I did manage to eek out these c u-u-u-u te teacher gifts this week.  
However, and don't kill me, I did not produce the tutorial.
Tell Court and Molly not to fire me from blogging.


So this Chalk Cloth business is fun! 
My supply came from our amazing, wonderful sponsor the Online Fabric Store.  


I sewed the patch of chalk cloth onto some leftover drop cloth I had (member my pillows?).  


Then I essentially made a little pillow with sweet Christmas fabric on the other side and attached a loop of dark red grosgrain ribbon for hanging.


Do you recognize the handsome man in the photo?


I thought they turned out really cute.  Put together with one of those cool chalk pens and wrap in a cellophane bag and its a sweet Christmas gift.   I like the idea of the kiddos writing the message, too. Could be the year (2011), could be the name, or perhaps a special thank you message.

Happy Holidays everyone.  I won't be with my sisters and nieces and nephew this year (tear) but I will be where it is warm with the in-laws. 


Photobucket

May 25, 2011

Master Bedroom Update

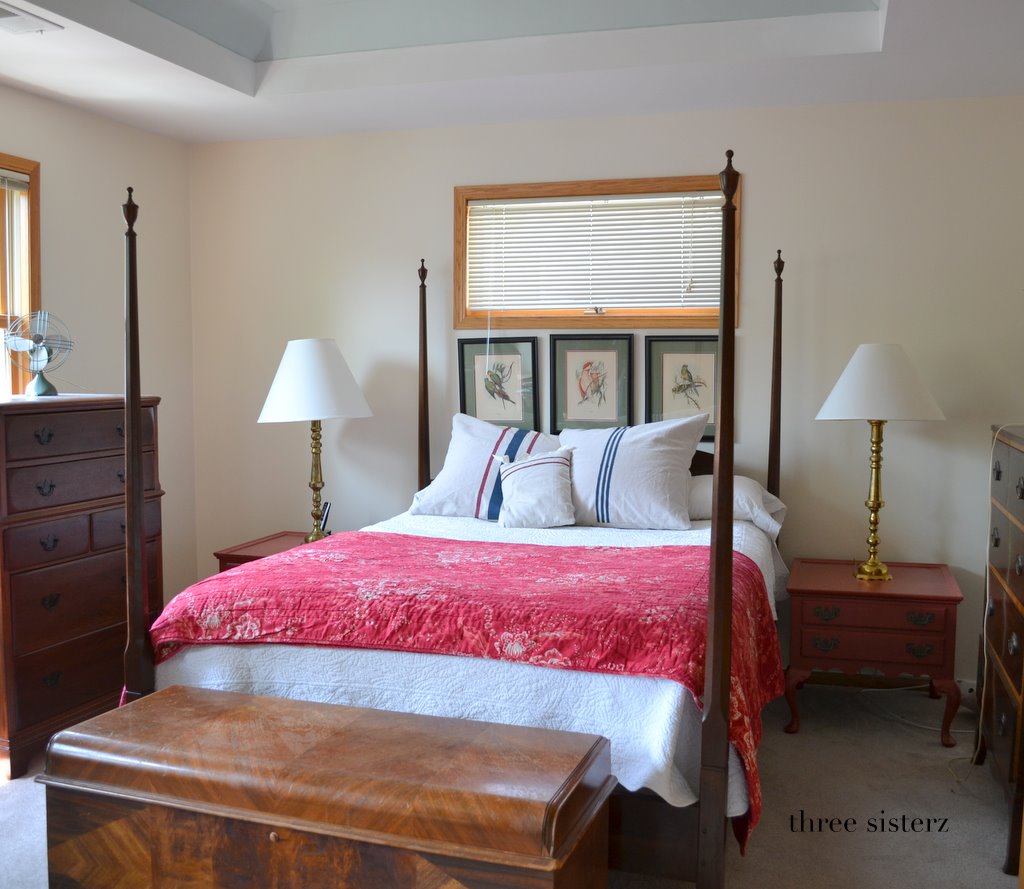
Remember my bedroom re-do?  I blogged some inspiration pieces, coveted my mother's four poster Stickley bed, and then whipped up some drop cloth pillows to put the inspiration into actual action.  It's time for an update...since we moved. Now you can see what I've done because: a) I'm in a new house and; b) I got my mom's bed!!!!!!!!!!!


If you notice, I used the same bird prints that were my husband's grandmothers.  I just had them reframed.


This house is not as charming or vintage as my old house.  Plus, we're renting so I'm not painting.  Still, I feel like our inherited furniture and art makes the room.
Doesn't the bed look pretty?


Kept the tall brass lamps that came from both mothers.  They are large Mexican candlesticks that we made into lamps.


And, well, I don't want you to think that my house is ever that immaculate.  Because it's not. This is a typical scene during the day.
Laundry not put away yet.
Socks not matched yet.  
Bed frame that originally held the bed has not been taken away yet.


This is my husband's dresser. Beautiful, yes?  It came from his grandfather.  I wonder if his grandfather ever put his laundry away?


Thanks for taking a peek. Now, do you have a piece of furniture that you love?


April 7, 2011

::TUTORIAL:: Drop Cloth Pillow with Grosgrain Ribbon Ties

We are so excited to be guest posting for Tracie over @ Cleverly Inspired today! We love Tracie's work and are honored to be filling in while she is on spring break. Today we're going to show you how we made this super easy, super cute drop cloth pillow.


This pillow was originally part of my bedroom re-do that we did a few weeks back. Court loved them so much that we decided to recreate one for her family room.

Supplies:


--painter's drop cloth (Home Depot--6x9 was about $10)
--painter's tape
--fabric paint (we got ours @ Michael's)
--paint brush
--12" x 16" pillow insert (we got ours @ Jo-Ann's)
--4 pieces of grosgrain ribbon, cut to 13" long

This project involves three steps: Prep Work, Painting & Sewing.

::PREP WORK::
1. Wash and dry drop cloth to soften it. Iron.
2. Cut a piece that measures approximately 13" x 34".
3. Lay it on a flat surface that is protected since you will be painting.

::PAINTING::
1. Cut three pieces of painter's tape that are all roughly 16 inches long.
2. On one side, measure in four inches. Lay one piece of tape from top to bottom and press to secure it to flat surface. The paint does tend to bleed a little bit, but we liked that that gave it an imperfect, vintage feel.


3. Measure in one inch and lay second piece of tape. Press to secure.


4. Measure in another one inch and lay third piece of tape. Press to secure.
**We added two more pieces of tape, but you can stop at 3.**


5. Paint between pieces of tape. Remove tape immediately.


6. Allow four hours to dry before sewing. Allow another 72 hours before washing.


::SEWING::
The sewing of this project involves hemming the edges, attaching four ribbon ties and sewing pillow sides together.

1. Start on the end of the cloth that is closest to the paint stripes. Fold in 1/2" and iron.


2. Fold in another 1/2" and iron.


3. Place one grosgrain ribbon strip three inches from the edge of cloth along the ironed hem and pin place.


Repeat on the other edge.


4. Sew the hem closed using 1/4" seam making sure to include ribbon ties.


Feel free to sew a second stitch across ribbons to secure even more.


5. Repeat steps 1-5 on the other short end so that both short ends now have a finished hem with ribbons/ties attached.

6. Fold cloth right sides together lining up short ends and ribbons.


7. Pin the long sides together and sew a 1/4" seam taking care to backstitch at start and end.


8. Do a zig zag stitch to avoid fraying.


9. Turn pillow case right side out. Insert pillow form and tie ribbons closed.
*Use fray check to ends of ribbon to avoid fraying.*

Ba...da....BING!


Super cute, right? It is cute on its own or paired with other pillows!


Here is the little red striped one Molly & I made for the bedroom re-do.


It is such an easy, simple pillow to make and so versatile. You could make different sizes, applique it, make with fabric, etc. The options are endless!


February 23, 2011

Bedroom Makeover with Drop Cloth Pillows

What do you get when you mix two sisters, four kids, a bottle of wine and a bag of Starburst jelly beans?
You get the most amazing bedroom makeover ever.


Remember my bedroom inspiration post a few weeks ago?
I really wanted my room to look something like Miss Mustard Seed's guest room: 


Molly came to visit and we set to work making drop cloth pillows that were inspired by all of the feedsack style pillows that you see in blogland and, of course, Pottery Barn:


I'm pretty sure I like ours better.  As in, can I hang in my room all day?  
Take a look.


We made two Euro size pillows with stripes.


Then we added a smaller pillow with my last name initial "B".


Seriously, admit it.  They really are pretty cute.  The little red pillow is tied with creamy grosgrain ribbon.  We sewed that one a little bit differently than the others.  That tutorial will come shortly.  It's shockingly easy.


We initially set out to really, truly mimic the feedsack and have faded stripes but as we got to painting, we decided we wanted a stronger statement so we painted the stripes on pretty heavily.


We used a super easy pillow tutorial from Lemon Tree Creations.  Takes all of 10 minutes.  It would be a great beginner sewer project.


Here is the bed layered up.  There's a creamy white Pottery Barn duvet under there.  The red quilt is Pottery Barn outlet from a few years back.


The bird prints were handed down from the Buchanan's.  The mirror was picked off the trash here in Longmeadow (rather shamelessly by my mother).


This is my side of the bed.  NOT.


So sweet on my grandmothers red chair.  Have I mentioned yet that red is my favorite color?


Tutorials for the pillows to follow soon.  
In the meantime, tell me, what would make your bedroom more inviting to you?